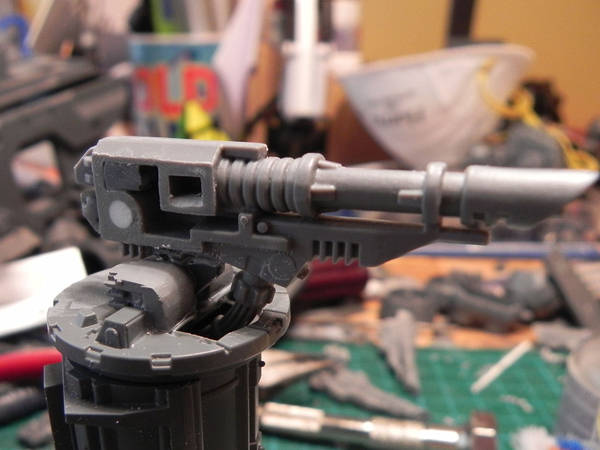
Greetings fellow hobbyists…welcome to another tutorial from Cypher’s Forge. I quickly knocked up a couple of Razorback turrets last night whilst waiting for stuff to dry on another project. This is, hopefully, what your gonna end up with, so read on…
Components:
For this particular conversion you will require:-
1 x Razorback Turret mount
1 x Razorback Weapon mount
3 x Razorback Lascannon halves (1 full set plus 1 extra)
2 x Storm Raven Turret Plasma Cannons (or 2 x Marine Plasma Guns, though these look a bit small)
2 x Storm Raven Turret Weapon Shields (or the Razorback weapon shield)
1 x Vehicle Heavy Weapon Targeting Sensor
Note: For plastic models I always use liquid poly (plasticweld)…its almost like water in consistency and is excellent for gluing plastics as it melts the top layer of the bonding surface. There are varying strengths of this stuff around, some will attack plastics more savagely than others (plasticweld is particularly aggressive) so it’s worth testing on a bit of sprue beforehand if you have never used it. You will also need an old brush for applying it (don’t expect to use it for painting afterwards though ) and ideally you should have plenty of ventilation, unless you really like pounding headaches!
Process
Start by cutting off one of the location pegs from the weapon mount and glue it in place on the rear hole of the turret mount.
Next, make some rough cuts (as shown) on the weapon mount.
When you are finished it should look like this – note that the weapon mount is still in the same orientation as the previous photo.
Smooth the rough edges down with a bit of fine grade wet ‘n’ dry paper or a needle file.
Choose the odd Lascannon for your main weapon (you will need the paired Lascannons in a moment), then carefully chop off the circled bits. At this point you can also remove the thin strip used for locating the weapon shield from the top of the Lascannon. Put this Lascannon to one side…you don’t want to mix it up with what your about to do next!
Take the paired Lascannons and chop off the very back portion and the power cable on each. You now need to cut away the locating holes from both weapons as shown.
Clean them up and they should look like this.
Glue the weapon mount to the bottom of the main Lascannon and leave to dry.
Cut away the centre of the turret that separates where the individual power cables/ammo feeds used to run, then clean up the hole. Remove the detailing and sand the surface on the turret’s top as shown.
Use plastic waste to fill in the gaps on the rear of the Lascannon then file it flat once it’s dried.
Attach the mountings you cut from the paired Lascannons. At this point ensure that they move fairly freely. If they bind quite badly gently scrape away some plastic from the spigots with a modeling knife until the mountings free up.
Now for the fun part! Glue the weapon mountings to the turret base ensuring that the power cable is central both vertically and horizontally. Leave for a few minutes then gently test that you can elevate the Lascannon and nothing catches or jams. Adjust as necessary.
Glue the weapon armour to the Plasma Cannons and chamfer a 45 degree angle on each as shown, so that when you attach the weapon to the Lascannon it will mate nicely. I used the armour from the Storm Raven Turret, however, you can do exactly the same thing with the armour from the Razorback…just cut it down the middle, attach each half to the Plasma Cannons and file to fit.
Attach the Plasma Cannons to the Lascannon.
Attach the Targeting Sensor. Initially I was going to use the Targeting Sensor from the Razorback, but then I found some slightly larger Sensors from an old LandRaider which seemed to fit a bit better. Anyway, regardless of which one you use you will need to file a groove on the underside to allow it to sit neatly on top of the Lascannon.
So, there you have it, the Razorback Lascannon with Twin Linked Plasma Guns.
Cypher


